The Ultimate How to Apply Lipstick Tutorial
The Ultimate How to Apply Lipstick Tutorial
This is my ultimate guide to applying lipstick tutorial. An all encompassing how to on applying your lip color.
I get questions asking about what are the best lipstick application tips and tricks quite often. I already have a video on applying a red lip and lipstick. I figured for those who prefer blog posts with photos, I'd make one for you too. You will be able to apply lipstick like a pro once we’re done!
This tutorial will cover each of the steps I take to apply lipstick so it will look nice & clean and last longer.
Follow along if you'd like to learn how to apply lipstick that lasts and has a crisp, clean application. Great for weddings, date-nights and prom makeup.
Related tutorials
How to Apply Lipstick Step by Step Photo Tutorial
How I care For my Lips and Lip Care Routine
Swatches of the Marc Jacobs Le Marc Red Lipsticks
My Top 5 Favorite Red Lipsticks
Disclosure: This post is not sponsored. Some links below may be affiliate links. Some items are press samples.

Prep your lips.
While I do my morning skincare make sure to exfoliate my lips and get them ready for lipstick application.
You can use a damp wash cloth and gently rub or use a sugar scrub gently massaged into your lips. I then add a thick layer of some type of lip balm and leave it on while I complete my makeup.
You wanna prep your lips like this so they are smooth and hydrated before applying lipstick. This will also make your lipstick look so much nicer. Make sure to click here and check out my video on my lip care.

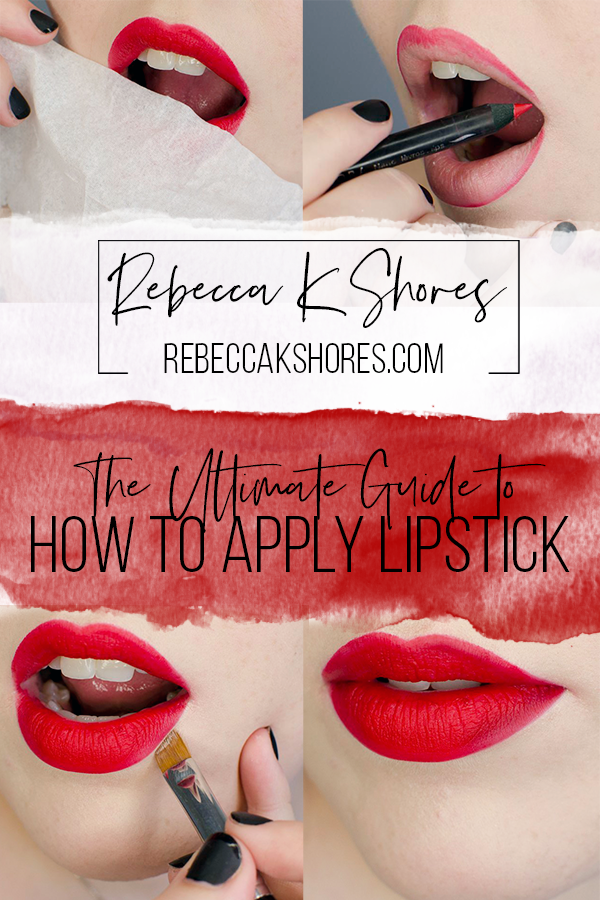
When doing my makeup, I do my lips last. To remove the lip balm, I take a cotton ball and roll it along my lips.

Prime your lips
I am using Mac Prep and Prime to prime the lips.
Primers will add some moisture and create a barrier between your lips and the lipstick. With this barrier your lipstick will last longer & I find it helps keep my lips from drying out.

Apply a clear lip liner
This step is optional if you're younger or don't have issues with bleeding edges.
This step is important if you're using a very creamy or lip sticks with a low viscosity.
Apply the clear lip liner around the perimeter of your lip line, or wherever you get bleeding. I personally experience bleeding with most lip colors, but only on my top lip. I will apply it to my top lip only as needed. I use Urban Decay Ozone as my go to clear lip liner.

Line your lips
Use a lip liner that matches the lipstick you'll be wearing or one that matches your own lip color.
I am using Sephora Collection Nano Liner in Real Red 20. (This lip liner is discontinued so I would recommend Mac Cosmetics Cherry lip liner as a replacement)
This step with give your lipstick something to really stick to & also helps it to last longer. Start out be making an "X" on your cupids bow.

Using upward strokes, draw a line along your top lip line from the outer corner towards the cupids bow. Stop where you want your lip line to curve.

Draw a straight or mostly straight line along the center of your bottom lip.

Finish the curve of the top lip.
I hold my lip pencil below my lip line & pointed almost straight up for this step. You will notice that I draw some on my lip because of the way I hold the pencil.
I draw from the cupids bow to the straight line, which I find is the easiest.
As you can see, I slightly over-draw my top lip, but this is optional. You can over-draw, under-draw or just follow your natural lip line. Whatever is most flattering for your face and lip shape.

I start at the corner edge of my bottom lip and bring the line down to the center line.

Now go in to get the very corners. This will give a more seamless look to your lips & it will look better when you're talking and opening your mouth if you do this step.
Open your mouth slightly and draw into the very corner edges. Do this carefully since you really wanna stay inside your natural lip line here.

Fill in the whole lip with the lip pencil. This gives the lipstick something to stick to and will help it last longer. This step can be semi-sloppy, since we will be going over it with the lipstick.

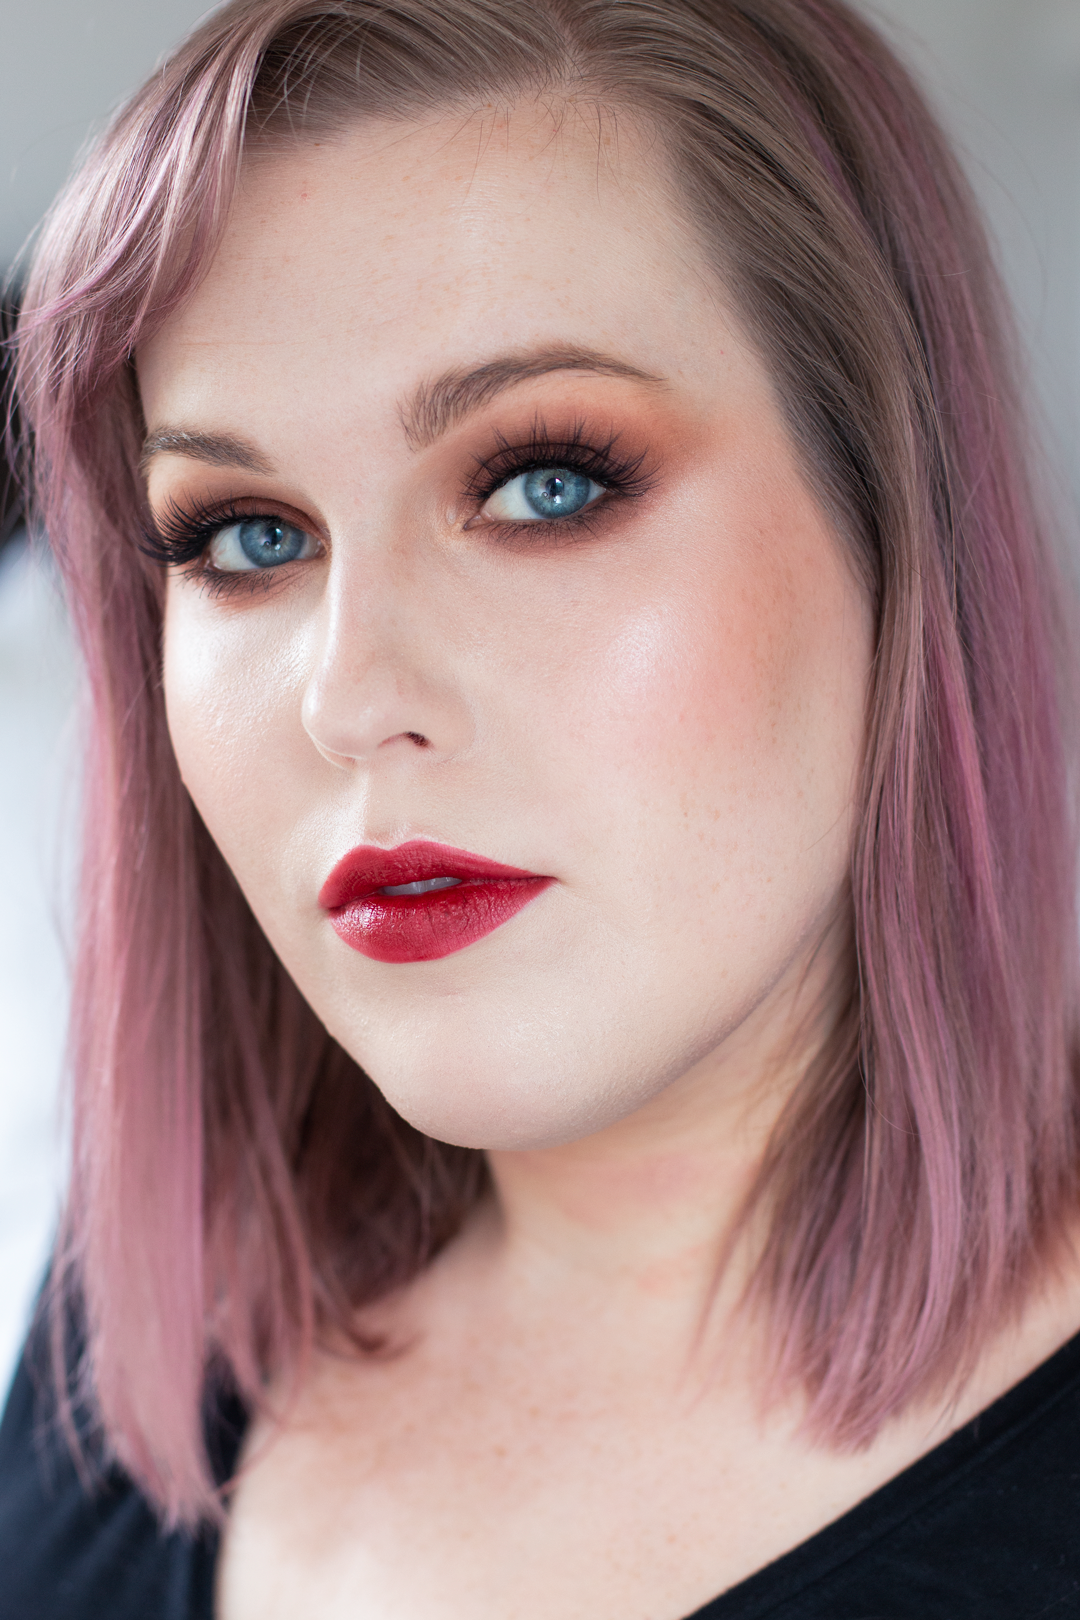
Now, grab your lipstick of choice. I am using my all time favorite matte red lip stick Mac Ruby Woo.
Take the tube, since brushing on your whole lips take much too long, and start applying it to the center of the lips outwards

This is about how much I put on straight out of the tube. I try to apply a good amount, but I wanna keep the edges crisp, so I don't get to close. We'll finish the edges with a lip brush.

Grab a lip brush (I'll be using a Sigma L05) and load it up with lipstick.
In the same direction we applied the lip pencil, line your lips with the lipstick. This will get you that pretty, crisp look.

makeup Artist tip!
This step is optional, but will keep your lipstick on longer. (It is a must for bridal makeup) Take a tissue and if needed, separate it into a one-ply. Gently press the tissue to your lips to blot. This will get rid of any extra emollients and leave the pigment behind.

You can see this will take a bit of the lipstick off, but no worries, just go over it with your lip brush where needed.

Here's what it looks like with the lip brush going over for a second thin layer.
Another optional step to ensure your lipstick will last is to take a translucent powder (I prefer using a matching blush/eyeshadow) and using a synthetic brush or your clean finger pat a thin layer of powder over the lip color. This will make the color very matte, but it will also keep it on much longer.
This is a great step for bridals or if you’ll be eating/drinking and wearing a bold lip color.

Take a little bit of concealer and a concealer or angled brush & use it to clean up the edges. I am using NARS Concealer in Chantilly and Sigma E68 brush.
You can use your pinky as a way to stabilize your hand if needed.

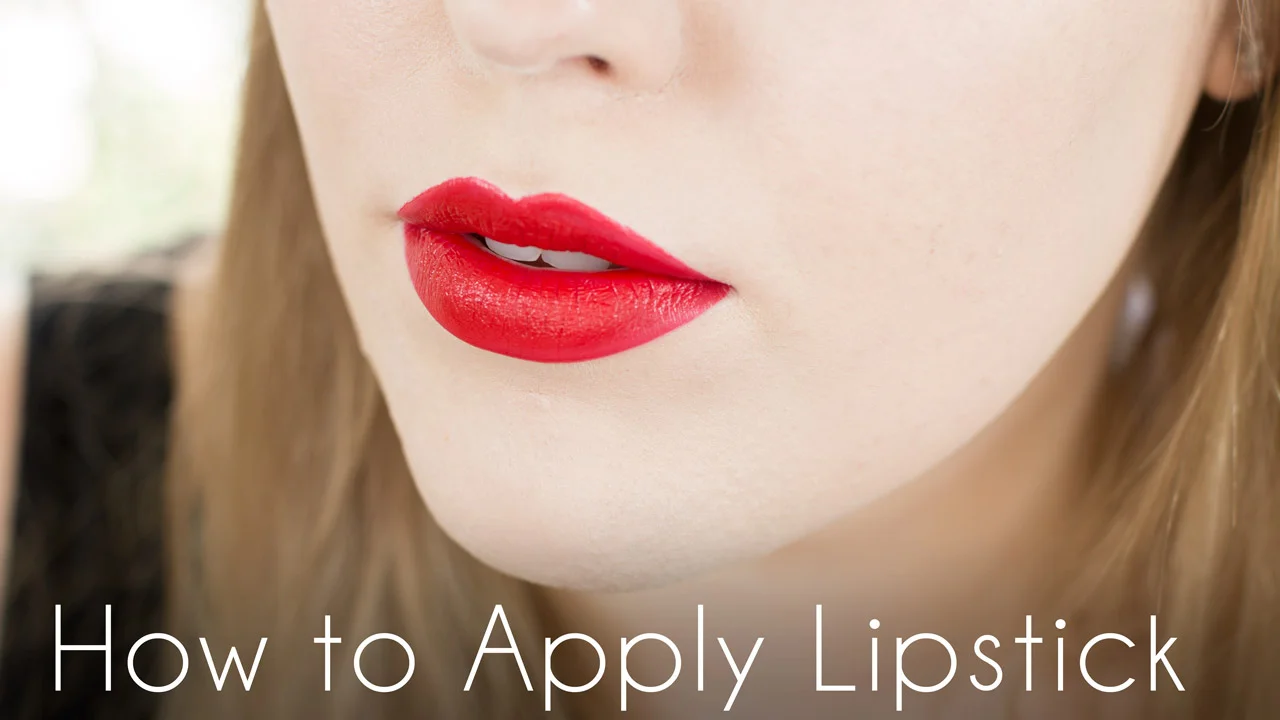
Ta-da! Now you're all ready!

If you're adding gloss but still want the look to last longer than normal, apply the gloss just to the center of the lips. This will still give your the glossy effect without letting the edges bleed.
I hope you found my Ultimate Guide to Applying Lipstick helpful. Do you love a red lip? What’s your favorite lipcolor or what’s your best lipstick tip? Comment below!
-Rebecca